Sunday 21 April 2013

MUA Power Pout

I am sooo sorry for the lack of posts, but I have four university essays due in over the next two weeks and it's my birthday on Wednesday. This means I'm going to London for a week or so on Tuesday evening so I kind of need to have the majority of my essays done by then which is what I've spent all week trying to do! I will try and blog whilst I'm in London on my boyfriend's laptop, I'm going to take my DSLR with me and I'm doing a beauty shop at Westfield White City on my actual birthday so I'll have plenty of products around me. I'm also doing a MUA course on Monday 29th April, it's nothing spectacular, but it's a step in the right direction anyway! 

So, back to the main topic, this blog post will be on MUA's new Power Pouts. I bought these a few weeks ago off the MUA website before they came in to store because I wanted to make sure I had all six. I've now had the chance to use every colour more than once and I've totally fallen in love with them, they are like a cheaper version of the Clinique Chubby Stick and the Revlon Just Bitten! Kissable Balm Stain. I don't own a Clinique version but I do own a few of the Revlon ones so I can compare them to that and I honestly don't think there's much difference! They have a minty, fresh fragrance and they make your lips tingle. The application is super easy as it's like drawing with a large crayon. The fact they are a balm stain means I can get away with applying the product less as it stains my lips and it is less opaque than a normal lipstick, meaning it won't be too obvious if some comes away. 


First up is Justify:


Justify is quite an orange colour that I would usually be too scared to approach, but as it's only a stain it's not as harsh as a lipstick so I've given this a few tries since I bought it. I'm still not totally convinced the colour suits me, however it is a lovely colour otherwise.

Next is Irreplaceable:


This shade is quite a bright pink when worn and it reminds me of Illamasqua Lipstick in the shade Immodest but this is easier to wear as it is more sheer. I love my Immodest lipstick and I love this product too but as with Justify I'm just not sure either of them suit me too well which is quite disappointing really.

The third one I bought was Runway:


This is more of a red colour as opposed to the orange shade of Justify, however I'd call it a coral colour as when you compare it to Crazy in Love (shown later) it clearly isn't as red. I think this will be a perfect colour to wear in the summer.

Next up is Rendezvous:


This one is my favourite as I find it the easiest one to wear. The packaging can be a little misleading as you may think you're getting a beige/nude colour when it actually turns out to be a rose/pink shade. That being said it is a beautiful colour and is one of my favourite lip products to wear now.

As mentioned earlier I also bought Crazy in Love:


This is the darkest shade in the set and I always seem to fall for the berry shades, I just can't help myself. This is lovely and is not to dark to be worn of a day or in the summer when I usually feel like wearing perkier colours. This is probably my favourite after Rendezvous.

Finally we have Broken Hearted:


A lovely pink shade perfect for summer, but it is quite bright so I'm not sure how often I will wear it (I think it looks silly on me but I'm probably being too critical). 

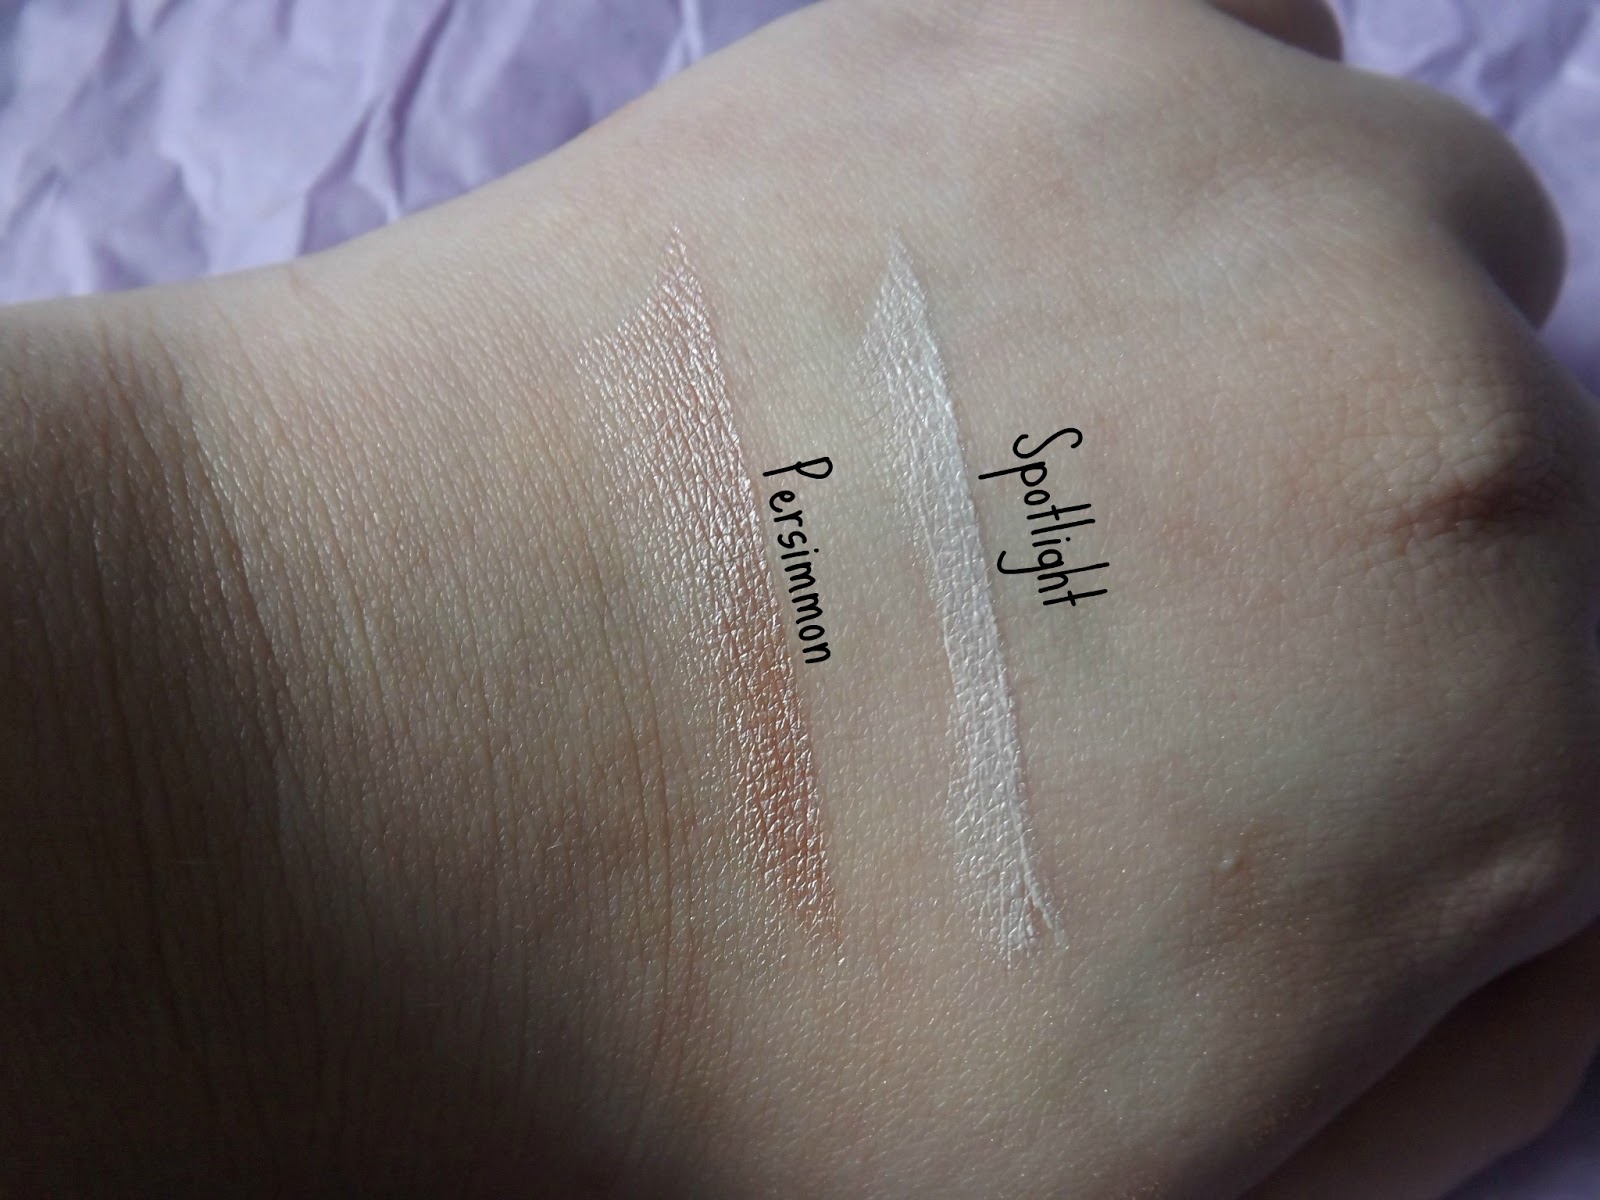
I have swatched all six in natural light and with a flash to give you an idea of their colour:


These are an absolute steal at £3 each, they are so much cheaper than the Clinique version and even the Revlon version! You can buy them from the MUA website linked here and they are also now in Superdrug stores. You can own all six for slightly more than one Clinique Chubby stick alone and although I'm unsure of some of the colours there will be a perfect shade for everyone in the set. I tweeted MUA when I bought them and they asked me my favourite shades and although I do love them all, for me personally it has to be Rendezvous and Crazy in Love.

Have you tried these yet?

Amanda xx

Tuesday 16 April 2013

e.l.f. Lipstick

More items from my haul in this post, this time the three e.l.f. lipsticks I bought.


The three I chose were Flirtatious, Nostalgic and Captivating. Although they are generally nice colours they looked a little different to the shades I was expecting. All three lipsticks have a creamy texture and give good coverage but I didn't find them very long lasting, however this just means you need to touch it up a bit more than usual. Also, after trying my new Velvetines I don't think anything will ever compare to them in terms of how long they last. I got all three from the e.l.f. website which I have linked here and they retail for £1.50 which is incredibly good value, however I got mine for 75p each with my 50% off code. If you consider the price then I think that are a bargain buy.


Flirtatious is a lovely pink colour that works well with my skin tone. 


Nostalgic is a nude/peach colour which is my favourite shade of lipstick.


Captivating is more of an orange colour which doesn't really suit me very much however it would probably be a lovely shade for some people.


Above are swatches of them under natural light and below are swatches with a flash.


So, although they are not the longest lasting lipsticks I own, for £1.50 (or 75p in my case) they are a bargain and are certainly worth a try. 

What are your favourite lipstick brands? Have you tried any e.l.f. lipsticks?

Amanda xx

Illamasqua nail varnish/nail art

I knew I wouldn't keep my nails the same for very long, so I've already painted them a different colour and attempted different nail art! Today's look is a lot simpler and I used Illamasqua varnish to create it.


I was going to paint Rampage on my nails first and then do the details with Radium, however because it is Spring I decided to switch them round for a brighter look.

I applied two coats of Radium first which left my nails looking like this:


After doing this I used one of the dotting tools mentioned in this post to dot my nails with Rampage. I covered my nails with a top coat and this is the finished look:


I really like Illamasqua nail varnish but I only own these two so I think I need to get buying a few more! 

What are your favourite nail combinations?

Amanda xx

Monday 15 April 2013

e.l.f. All Over Colour Stick

I bought two of the All Over Colour Sticks in my recent e.l.f. haul and they are supposed to be a 3 in 1 colour. This is because you can use them on your cheeks/face, lips and eyes.


I chose two shades called Persimmon and Spotlight for different purposes, Persimmon for my cheeks as a cream texture blusher and Spotlight as a highlighter. 


Spotlight reminds me of Gleam in Aurora by Illamasqua. I found it a little harder to blend in than Illamasqua's highlighter however if you're willing to put a bit more effort in to buffing you will get a really similar effect but for a fraction of the price. Persimmon looks lovely when buffed onto my cheeks as a blusher however it did take a lot of buffing to blend it in to the skin like Spotlight. That being said you can't really moan when they are only £1.50 each. The tubes can seem a little deceiving as there is less product in there than I expected, but again it's £1.50 so it's not breaking the bank. I actually got mine for 75p each because of the 50% off code I have mentioned previously so that makes it even more of a bargain for me. You can find these products on the e.l.f. website linked here.

I still prefer my MAC and Illamasqua highlighters compared to this, but if I needed a replacement highlighter and was strapped for cash this would be high on my list along with MUA's new highlighter which I will post a review about soon!

Amanda xx

e.l.f Tone Correcting Powder

Another item I bought in my e.l.f. haul was their Tone Correcting Powder. My cheeks sometimes have a redness to them and it can be quite frustrating and I also have dark circles so I thought I would give this a try.


As you can see there are a few different shades in the powder and I sweep my powder brush across all four and apply it to my face. The product claims to brighten the skin, neutralise redness and even out skin tone. It does to an extent brighten my face, however it doesn't really do anything for the redness on my face which I suspect is because there is no green coloured powder. There is an option with a pale green coloured powder on their site which I didn't notice at the time of purchase so maybe I will have to give that one a try as well. The product retails at £3.75 which is really cheap and I managed to get it half price with my 50% off code. You can find the product linked here.

Amanda xx

e.l.f Brush Holder

I wanted some new storage for my ever-growing collection of make up brushes. I own 40+ brushes easily and keeping them all organised can sometimes be a pain. As part of my e.l.f. haul I mentioned previously I bought two large brush holders to take care of this problem.

This is what they look like:


The design is pretty simple and is all black with the name of the brand printed across the front. I like that the design is simple as it looks professional. The bottom right of my holder is slightly defected but it will still do the job fine. I actually like this holder so much that as well as buying the two large ones I also purchased a small one off their website last night too. It retails for £14.00 which is a bit pricey but I had a 50% off code so I got the two for £14.00 which is a bit more reasonable. You can buy this from the e.l.f. website linked here.

How do you store your brushes or make up?

Amanda xx

NOTD: Random concoction of nail art.

I've not been well for the past few days and consequently could not sleep last night. Whilst watching my Jane Eyre (my fave!) I decided to paint my nails and then I got a bit carried away with nail art. It is not perfect by any means and there are probably too many thing on my nails but it's just for fun!

I recently ordered my first Essie nail polish off Fragrance Direct for £1.99 and I decided to give this a go on my nails:


There were plenty of shades available to choose from but I decided on Super Bossa Nova. It has a slight pearl/shimmer to it when applied. I was pleasantly surprised by the quality of this polish, I actually only needed one coat to cover my nail which of course saves a lot of time and hassle and it dried within 2-3 minutes which I could not believe. I'd actually go as far to say that this is the best quality nail polish I have used. 

So after applying one coat of Essie I applied Models Own Blizzard to all of my nails except my ring finger:


This is part of the Wonderland collection by Models Own and is basically a glitter topcoat. I think if you tried to wear it alone you would have to apply a lot of coats and it would probably peel off (been there before in my teenage years). It retails for £5.00 and you can buy it from their site or in some Boots stores.

On my ring finger I decided to use some of the nail art items I got the other day:


They are cute, little hearts in all different colours and designs. I chose to use the pale pink ones that say 'LOVE' to go with the pink Essie varnish I used. You can see my post about the nail art items here.

I finished with a top coat and I also used Liquid Quick Dry on the Blizzard layer as it was taking quite a while to dry:


This Liquid Quick Dry is a life saver when I'm in a rush and need my varnish to dry quickly!

My nails aren't the greatest, they never seem to grow and when they do they usually start to break (if anyone has any tips to make them stronger it would be much appreciated). This aside this was the finished look:


I doubt I'll ever be amazing at nail art but I just mess around with it for fun. I'll probably take this off in a few days and try a different look!

What are your favourite nail art items?

Amanda xx

Real Techniques Brushes

There are probably hundreds of reviews about the Real Techniques brushes but I bought my first few about 10 days ago and have finally had a chance to use most of them now! I hope to get some more for my birthday next week because I really liked the ones I bought but for now I'll just be doing a review of those ones.


First up I bought the Foundation Brush:


 I already had a foundation brush which does the job well enough, but I've owned that since around September/October now and I felt the time had come to change it for a fresh one and Real Techniques seemed to be the way to go. I was pleased with the application and the fact that it didn't leave any streaks, but blended my foundation in perfectly. I also like the fact this brush is angled as it allows you to get to difficult areas around your eyes and nose. It created a perfect, flawless base for me and I am so glad I purchased this. I bought mine as part of the 3 for 2 offer in Boots, but you can get it from Superdrug also and off the Real Techniques website itself. This brush retails for £9.99 which I don't think is too much if you compare it to the price of a MAC brush which I definitely lust after but cannot justify. Here is the link to buy it from Boots on 3 for 2.

Second up in my 3 for 2 bargains was the Blush Brush which I also got from Boots:


I have been using this with my new MUA cream blusher, and I find it gives a lovely result. The blusher practically melts in to my skin creating a perfect, peachy glow and this brush makes it so easy with minimal buffing needed! I only bought 2 brushes from Boots as I was buying 4 Lee Stafford hair products as well. This retails for £9.99 in Boots linked here, and as I mentioned before I do not think this is expensive. I love how soft the bristles feel and I also love how thick the brush is. The tapered point allowed me to gather product just on the tip of the brush, avoiding the clown look.

For my other 3 Real Techniques brushes I visited the Feel Unique website linked here. When I ordered off Boots, the Stippling Brush was out of stock so I was happy to see this on Feel Unique and this was my first choice:


I was planning to use this to buff in any foundation if necessary but the Foundation Brush did such a good job that I didn't actually need to use this! This means I have not used this brush as of yet but I am still glad I purchased it. It retails at Boots for £11.99, however at Feel Unique it only cost me £10.99 so there was a little saving too! You can find the link to this brush here.

I also noticed that the Setting Brush was cheaper at Feel Unique too so I purchased this as well:


I use this brush to apply highlighting powder to my cheekbones and brow bones. I found that it allows me apply the powder with precision as the brush is small enough for precision but large enough to make application easy. I have yet to try this with my cream highlighter but I suspect it will be just as good for this too! This retails at Boots for £8.99 however I managed to get mine for £6.99 at Feel Unique linked here which meant I had saved £3.00 up to now, which is a fair amount!

The final brush I purchased was the Shading Brush:


This brush is used for eyeshadow obviously and I have only used it once since I bought it however I found the bristles to be lovely and soft against my eyes which is good as they can be a sensitive area. I found it applied the shadow nice and evenly. This normally retails at £7.99 however I got this for £6.99 at Feel Unique linked here. This means in total I saved £4.00 which nearly pays for a brush itself so I am very happy with my savings.

I don't know why it has taken me so long to try Real Techniques brushes but I''m glad I finally have and as I said I hope I receive the sets for my birthday next week!

Are you a Real Techniques fan? What is your favourite brush from the collection?

Amanda xx